Another Blast From The Past

Thirty two years ago (1984) I scratchbuilt this Pershing Missile trailer/launcher.  It’s mostly tiny bits of thin styrene plastic.  This thing has been bouncing around in my miniatures box ever since.  I never actually made the missile because at the time I was working only with hand tools and could not come up with an easy way to make a missile.

Pershing-1 Pershing-2


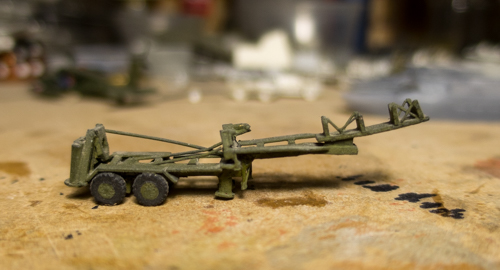
Well, 32 years later, I found this old model and decided to make a missile for it. Fortunately technology is going to make this task very easy.  I’ll just print it on my Stereolithography machine  🙂
2016-01-21_221528
PS:  Anyone know where I can find one of the 4 axle trucks that used to pull these in 1/285th scale?


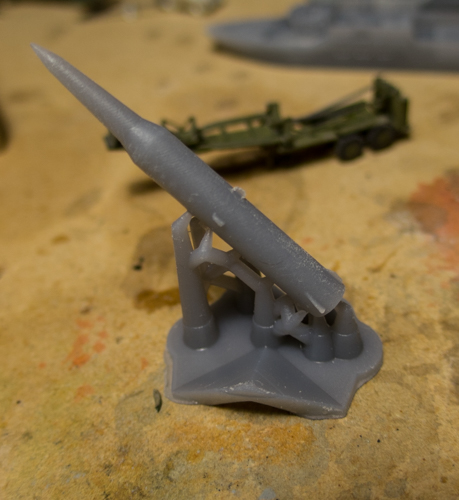
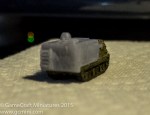
Update: (2 hours later) The missile has been printed and it came out nicely.  When I designed it, I was pretty sure I was making the fins too thin and they might not come out well in the print … I was right.  They will be cut off and replaced with very tiny pieces of plastic stock or something very thin.
Have you ever wondered what it would be like to have your own super high resolution stereolithography machine?  I’ll give you a hint, it’s pretty awesome.
Shapeways?  I don’t need no stinking Shapeways 🙂
PershingMissile-1

A Serious Trip Back In Time

These are probably the first aircraft I ever scratchbuilt in 1/285th scale.  This was about 34-35 years ago when I was about 17 or 18 years old.  They are balsa wood with thin sheet styrene wings and tails.  Yes,,, this is what I was doing as a teenager when all the cool kids were partying, drinking and getting laid.

The grey one is an A-1 Skyraider, the green one is an OV-10 Bronco

They are total crap … but we all started somewhere.IMG_2282

Back To The Airport

I just brought out my airport boards to work on … And hopefully finally finish up.  A few of them have developed a bit of a warp while in storage ,,, gotta try to get that sorted out before going any further.

Airport Boards

Update… I clamped down all the corners of the boards … I’ll leave them like this for a day or two and see what happens.  Hoping for the best.
If this does not work perhaps I’ll have get the back sides of the boards moist and then clamp them down and let them dry like that.  Fingers crossed, I’m not really interested in starting over on these.
Boards Clamped Down

New Gaming Video Project

I am starting a new project that might interest some of you, it will be a show called “In The Game Room” that will be published from time to time on YouTube.

A good friend of mine, Harold from Clear Horizon Miniatures recently started an audio podcast with his buddy Jason called “In the Garage” and they are doing an amazing job of it. Their podcast inspired me to dust off some of my podcasting equipment and do a video podcast. If you want to check out Harold and Jason on their podcast, click herehttps://soundcloud.com/mister_harold

My show may feature some GameCraft products now and then, but mostly it’s going to about gaming, miniatures and scenery, and my personal game boards, scenery, miniatures and games. There should be lots of tips and tricks, tutorials, talk about games and rules, and stuff like that. There will be a lot of emphasis on Micro Armor (6mm) gaming, because that’s what I do, but there will be a lot of info generally relating to gaming, scenery and miniatures of all scales also.

The video below is a sort of preview episode explaining what my show is going to be about and a sort of introduction to me.

1/285th Scale Aircraft Tug

Something I’ve been needing for a while for the deck of my USS Wasp.  Just a little fine tuning to do on this one and then I’ll start casting it.  I’ll probably make about a dozen of them for the Wasp and if anyone else is interested maybe I’ll put some on cgmini.com
These could also be cool for my airport boards if I ever get them done.

Tug-1 Tug-2


M4 C2V Conversion Kit

Here’s something new I’m working on.   The M4 Command and Control Vehicle.  This vehicle was developed by the USA Army and BAe Systems.  439 vehicles were meant to be delivered to the US Army but the program was cancelled in 1999 after only about 20 were delivered.  This is a pretty cool looking vehicle, so even though it never really got fielded in any great numbers, I want to make one.  Perhaps I’ll just say that the Republic of Malakastan ended up buying the 20 units from the US Army.

This is a work in progress and much fine tuning and detailing is yet to be done on this model.  The piece I’m making is just the rear enclosure and will be cast in Pewter, I’ll put them on GHQ MRLS chassis.

Help Me Decide…

Warning, the geek level in this post is off the charts.

Quite often when people play wargames, they create a fictitious country where the campaign takes place.  Some even go as far as creating elaborate backstories, armies, flags, etc for the country and even placed it on the world map.

For many years my go-to country name for fictitious battles has been “Malakastan”.  I have not gone as far as to dream up a backstory or a location or create an army for it ,,, but tonight i thought it would be fun to create a flag that I can hang in my game room.

Here are the two candidates that I’ve come up with.  As you can see, they are nearly identical but I’m stuck on the crown color.  I like the yellow, but wonder if it blends into the background too much.  Also is the red too much?  If so, what color would you use?

Which do you like?

#1 with Yellow Crown
Test2

#2 with White Crown
Test1